
Introduction
This project is for identifying canine breed given an image of a dog. If supplied an image of a human, the program will identify the resembling dog breed. I implemented CNN using not transfer learning and CNNs using transfer learning with VGG-16, VGG-19 to classify dog breed. At the end of this post, I will compare 3 models for performance.
Process
- Step 0: Import Datasets
- Step 1: Detect Humans
- Step 2: Detect Dogs with ResNet-50
- Step 3: Create a CNN to Classify Dog Breeds (from Scratch)
- Step 4: Create a CNN to Classify Dog Breeds with VGG-16 (using Transfer Learning)
- Step 5: Create a CNN to Classify Dog Breeds with VGG-19 (using Transfer Learning)
- Step 6: Compare above 3 models
Environment
- AWS EC2 p2.xlarge
- Jupyter Notebook
- Python 3.5, Keras, TensorFlow 1.1
Step 0: Import Datasets
Import Dog dataset and divide into train, validation, and test datasets. Dog images is composed of 8,351 images which are categorized into 133 breeds.
from sklearn.datasets import load_files
from keras.utils import np_utils
import numpy as np
from glob import glob

# define function to load train, test, and validation datasets
def load_dataset(path):
    data = load_files(path)
    dog_files = np.array(data['filenames'])
    dog_targets = np_utils.to_categorical(np.array(data['target']), 133)
    return dog_files, dog_targets

# load train, test, and validation datasets
train_files, train_targets = load_dataset('dogImages/train')
valid_files, valid_targets = load_dataset('dogImages/valid')
test_files, test_targets = load_dataset('dogImages/test')
Import 13,233 human images.
import random
random.seed(8675309)

# load filenames in shuffled human dataset
human_files = np.array(glob("lfw/*/*"))
random.shuffle(human_files)
Step 1: Detect Humans
I used Haar feature-based cascade classifiers to detect human faces in images. OpenCV provides many pre-trained face detectors, stored as XML files on github.
import cv2

# extract pre-trained face detector
face_cascade = cv2.CascadeClassifier('haarcascades/haarcascade_frontalface_alt.xml')

# returns "True" if face is detected in image stored at img_path
def face_detector(img_path):
    img = cv2.imread(img_path)
    gray = cv2.cvtColor(img, cv2.COLOR_BGR2GRAY)
    faces = face_cascade.detectMultiScale(gray)

    return len(faces) > 0
Step 2: Detect Dogs with ResNet-50
I used a pre-trained ResNet-50 model to detect dogs in images.
from keras.applications.resnet50 import ResNet50

# define ResNet50 model
ResNet50_model = ResNet50(weights='imagenet')
Pre-process the data
When using TensorFlow as backend, Keras CNNs require a 4D array as input, with shape (nb_samples,rows,columns,channels)
from keras.preprocessing import image
from tqdm import tqdm

def path_to_tensor(img_path):
    # loads RGB image as PIL.Image.Image type
    img = image.load_img(img_path, target_size=(224, 224))
    # convert PIL.Image.Image type to 3D tensor with shape (224, 224, 3)
    x = image.img_to_array(img)
    # convert 3D tensor to 4D tensor with shape (1, 224, 224, 3) and return 4D tensor
    return np.expand_dims(x, axis=0)

def paths_to_tensor(img_paths):
    list_of_tensors = [path_to_tensor(img_path) for img_path in tqdm(img_paths)]
    return np.vstack(list_of_tensors)
Dog detector
It makes the prediction using resnet50. If a image is classified between 151 to 268 using ResNet50, it is a dog image.
from keras.applications.resnet50 import preprocess_input, decode_predictions
from keras.preprocessing import image
from tqdm import tqdm

def ResNet50_predict_labels(img_path):
    # returns prediction vector for image located at img_path
    img = preprocess_input(path_to_tensor(img_path))
    return np.argmax(ResNet50_model.predict(img))

def path_to_tensor(img_path):
    # loads RGB image as PIL.Image.Image type
    img = image.load_img(img_path, target_size=(224, 224))
    # convert PIL.Image.Image type to 3D tensor with shape (224, 224, 3)
    x = image.img_to_array(img)
    # convert 3D tensor to 4D tensor with shape (1, 224, 224, 3) and return 4D tensor
    return np.expand_dims(x, axis=0)

def paths_to_tensor(img_paths):
    list_of_tensors = [path_to_tensor(img_path) for img_path in tqdm(img_paths)]
    return np.vstack(list_of_tensors)

def ResNet50_predict_labels(img_path):
    # returns prediction vector for image located at img_path
    img = preprocess_input(path_to_tensor(img_path))
    return np.argmax(ResNet50_model.predict(img))

### returns "True" if a dog is detected in the image stored at img_path
def dog_detector(img_path):
    prediction = ResNet50_predict_labels(img_path)
    return ((prediction <= 268) & (prediction >= 151))
Step 3: Create a CNN to Classify Dog Breeds (from Scratch)
I will build a simple 3 layers of CNN with a dense layer from beginning without Transfer Learning for comparison purpose. Building CNN from the start requires a lot of dataset and training time. It is demonstration to show the weakness of building CNN from scratch compare to Transfer Learning.
pre-process the data.
from PIL import ImageFile
ImageFile.LOAD_TRUNCATED_IMAGES = True

# pre-process the data for Keras
train_tensors = paths_to_tensor(train_files).astype('float32')/255
valid_tensors = paths_to_tensor(valid_files).astype('float32')/255
test_tensors = paths_to_tensor(test_files).astype('float32')/255
Build model.
| Layer (type) | Output Shape | Param # |
|---|---|---|
| conv2d_4 (Conv2D) | (None, 224, 224, 16) | 208 |
| max_pooling2d_6 (MaxPooling2 | (None, 112, 112, 16) | 0 |
| conv2d_5 (Conv2D) | (None, 112, 112, 32) | 2080 |
| max_pooling2d_7 (MaxPooling2 | (None, 56, 56, 32) | 0 |
| conv2d_6 (Conv2D) | (None, 56, 56, 64) | 8256 |
| max_pooling2d_8 (MaxPooling2 | (None, 28, 28, 64) | 0 |
| global_average_pooling2d_4 ( | (None, 64) | 0 |
| dense_5 (Dense) | (None, 133) | 8645 |
Total params: 19,189
Trainable params: 19,189
Non-trainable params: 0
from keras.layers import Conv2D, MaxPooling2D, GlobalAveragePooling2D
from keras.layers import Dropout, Flatten, Dense
from keras.models import Sequential

model = Sequential()

model.add(Conv2D(filters=16, kernel_size=2, padding='same',
                        activation='relu', input_shape=(224,224,3)))
model.add(MaxPooling2D(pool_size=2))
model.add(Conv2D(filters=32, kernel_size=2, padding='same',
                        activation='relu'))
model.add(MaxPooling2D(pool_size=2))
model.add(Conv2D(filters=64, kernel_size=2, padding='same',
                        activation='relu'))
model.add(MaxPooling2D(pool_size=2))

# https://keras.io/layers/pooling/
model.add(GlobalAveragePooling2D())
model.add(Dense(133,activation='softmax'))
Train model
model.compile(optimizer='rmsprop', loss='categorical_crossentropy', metrics=['accuracy'])

from keras.callbacks import ModelCheckpoint

epochs = 20

### Do NOT modify the code below this line.

checkpointer = ModelCheckpoint(filepath='saved_models/weights.best.from_scratch.hdf5',
                               verbose=1, save_best_only=True)

model.fit(train_tensors, train_targets,
          validation_data=(valid_tensors, valid_targets),
          epochs=epochs, batch_size=20, callbacks=[checkpointer], verbose=1)
Epoch 20/20 loss: 4.3976 - acc: 0.0596 - val_loss: 4.5385 - val_acc: 0.0443
Test Model
model.load_weights('saved_models/weights.best.from_scratch.hdf5')

# get index of predicted dog breed for each image in test set
dog_breed_predictions = [np.argmax(model.predict(np.expand_dims(tensor, axis=0))) for tensor in test_tensors]

# report test accuracy
test_accuracy = 100*np.sum(np.array(dog_breed_predictions)==np.argmax(test_targets, axis=1))/len(dog_breed_predictions)
print('Test accuracy: %.4f%%' % test_accuracy)
Test accuracy: 6.1005%
Step 4: Create a CNN to Classify Dog Breeds with VGG-16 (using Transfer Learning)
I used Transfer Learning with VGG-16 and a dense layer to train model faster and get better accuracy.
| Layer (type) | Output Shape | Param # |
|---|---|---|
| global_average_pooling2d_5 | (None, 512) | 0 |
| dense_6 (Dense) | (None, 133) | 68229 |
Total params: 68,229
Trainable params: 68,229
Non-trainable params: 0
Train the model
bottleneck_features = np.load('bottleneck_features/DogVGG16Data.npz')
train_VGG16 = bottleneck_features['train']
valid_VGG16 = bottleneck_features['valid']
test_VGG16 = bottleneck_features['test']

VGG16_model = Sequential()
VGG16_model.add(GlobalAveragePooling2D(input_shape=train_VGG16.shape[1:]))
VGG16_model.add(Dense(133, activation='softmax'))

VGG16_model.compile(loss='categorical_crossentropy', optimizer='rmsprop', metrics=['accuracy'])

checkpointer = ModelCheckpoint(filepath='saved_models/weights.best.VGG16.hdf5',
                               verbose=1, save_best_only=True)

# Train model
VGG16_model.fit(train_VGG16, train_targets,
          validation_data=(valid_VGG16, valid_targets),
          epochs=20, batch_size=20, callbacks=[checkpointer], verbose=1)
Epoch 20/20 loss: 8.2550 - acc: 0.4740 - val_loss: 8.6555 - val_acc: 0.4012
Test the model
VGG16_model.load_weights('saved_models/weights.best.VGG16.hdf5')

# get index of predicted dog breed for each image in test set
VGG16_predictions = [np.argmax(VGG16_model.predict(np.expand_dims(feature, axis=0))) for feature in test_VGG16]

# report test accuracy
test_accuracy = 100*np.sum(np.array(VGG16_predictions)==np.argmax(test_targets, axis=1))/len(VGG16_predictions)
print('Test accuracy: %.4f%%' % test_accuracy)
Test accuracy: 39.9522%
Step 5: Create a CNN to Classify Dog Breeds with VGG-19 (using Transfer Learning)
I used Transfer Learning with VGG-19 and 2 dense layers to get better accuracy than above models.
| Layer (type) | Output Shape | Param # |
|---|---|---|
| global_average_pooling2d_6 | (None, 512) | 0 |
| dense_7 (Dense) | (None, 50) | 25650 |
| dense_8 (Dense) | (None, 133) | 6783 |
Total params: 32,433
Trainable params: 32,433
Non-trainable params: 0
Train the model
bottleneck_features = np.load('bottleneck_features/DogVGG19Data.npz')
train_VGG19 = bottleneck_features['train']
valid_VGG19 = bottleneck_features['valid']
test_VGG19 = bottleneck_features['test']

VGG19_model = Sequential()
VGG19_model.add(GlobalAveragePooling2D(input_shape = train_VGG19.shape[1:]))
VGG19_model.add(Dense(50))
VGG19_model.add(Dense(133, activation='softmax'))

# Train model
checkpointer = ModelCheckpoint(filepath='saved_models/weights.bet.VGG19.hdf5',
                              verbose = 1, save_best_only=True)

VGG19_model.fit(train_VGG19, train_targets,
               validation_data=(valid_VGG19, valid_targets),
               epochs=40, batch_size=20, callbacks=[checkpointer], verbose = 1)
Epoch 20/40 loss: 0.0616 - acc: 0.9832 - val_loss: 1.6689 - val_acc: 0.7257
Test the model
VGG19_model.load_weights('saved_models/weights.bet.VGG19.hdf5')

VGG19_predictions = [np.argmax(VGG19_model.predict(np.expand_dims(feature, axis=0))) for feature in test_VGG19]

test_accuracy = 100 * np.sum(np.array(VGG19_predictions)==np.argmax(test_targets, axis=1))/len(VGG19_predictions)
print('Test accuracy: %.4f%%' % test_accuracy)
Test accuracy: 72.2488%
Step 6: Compare above 3 models
The condition of training for all model:
20 epochs, learning rate
| Structure | # Dense Layer | Transfer Learning | Test Accuracy |
|---|---|---|---|
| CNN: 3 Layers | 1 (133 units) | X | 6.10% |
| CNN: VGG-16 | 1 (133 units) | O | 39.95% |
| CNN: VGG-19 | 2 (50, 133 units) | O | 72.24% |
As you see, we can improve accuracy and reduce the training time a lot with Transfer Learning. Also VGG-19 has the better result than VGG-16 with 2 dense layers. VGG-19 has more stacked layers with more filters. It means it has more representation power than VGG-16 normally. Which means it can have better accuracy too. However, when we train more stacked CNN from scratch, it spends more memory, computation power, and time.
Also, we can figure out that we put 2 dense layers at the end of model, it leads to better accuracy than 1 dense layer.
Outcome
dog_human_detector("images/man-852762_960_720.jpg")
dog_human_detector("images/GettyImages-694355292-1503877610-640x426.jpg")
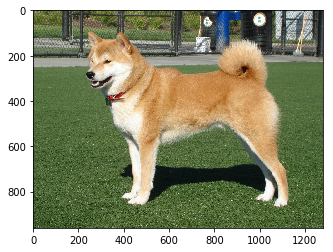
dog_human_detector("images/Taka_Shiba.jpg")
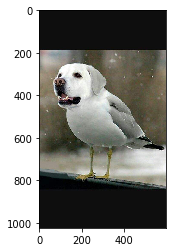
dog_human_detector("images/eebabf5825e8247d99ac2cd118db840ff31d7bfa_hq.jpg")
dog_human_detector("images/hotdog-taco-dog-today-161029-tease_845d920c7ea63371a9bf48203d22036f.jpg")
dog_human_detector("images/dog-human-hybrid-woman.jpeg")
Hello, human!
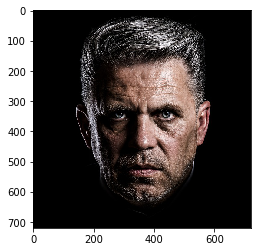 You look like Cairn_terrier
Hello, human!
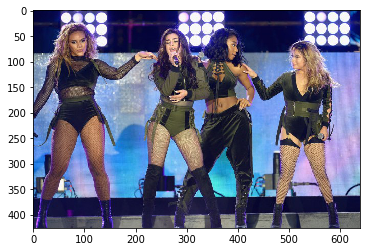 You look like German_shepherd_dog
Hello, human!
 You look like Akita
Hi, Dog!
 You look like Bull_terrier
Hi, Dog!
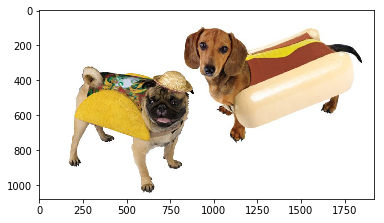 You look like Dachshund
Hi, Dog!
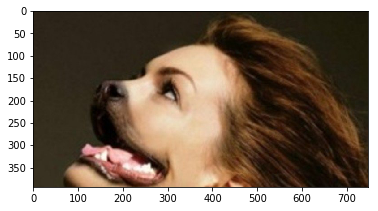 You look like English_toy_spaniel
Reference
[1] Artificial Intelligence. (n.d.). Retrieved from https://www.udacity.com/course/ai-artificial-intelligence-nanodegree–nd898